So you are thinking about purchasing your first wood chipper, or maybe you already have one and you’re just looking for a crash course in operation and maintenance–either way you’re in the right place because I’m going to cover everything you need to know about owning and operating a wood chipper.
Today I am going to cover the difference of the most common models on the market–the standalone gas powered chipper, and Tractor driven (PTO) model. Much of what is covered can be applied to chippers universally.
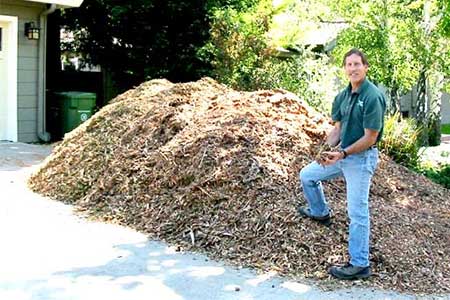
In doing your property maintenance a wood chipper is one of the most handy pieces of equipment to keep around. Regardless of whether it was done by yourself, or mother nature, having a chipper handy makes for quick cleanup of any trimmings or fallen trees, and it turns it all into usable mulch or compost for a happier, more healthy property.
How Wood Chippers Work
There are two basic categories that chippers are identified by, that being the standalone engine powered chipper, and the PTO powered chipper. Both are viable options, and while the maintenance may differ slightly, the overall function is nearly identical, and if you can use one, you should have no problem using the other.
Aside from the different driving forces, chippers can be broken down into a few parts that perform the actual process. I am going to break this down in the order they occur during regular use.
• The Operator puts branches, up to the approved size, into the gravity fed hopper (infeed chute) of the machine. This forces them into the flywheel in the rotor housing at the base of the hopper.
• The flywheel has sharpened knives attached. A counter knife is mounted to the housing. This is the mechanism responsible for the chipping.
• The chips are then blown out of the output chute by the centrifugal force created by the rotation of the flywheel (rotor).
It’s a pretty straight forward system that’s easy to maintain – and it undoubtedly opens doors when it comes to maintaining your property. Now that you know the basic function of a chipper, I am going to break it down even further and cover the specific operation of both the MDWC-1500 (standalone), and WC-510 (PTO) models.
Gas Powered (Motorized)
MDWC 1500
This type of chipper is a standalone model, meaning it is powered by an engine. This model hooks up to the ball hitch on the your utility vehicle. This makes it easy to move to the desired location for chipping. It is also easily moved by hand.
If you do not own a tractor (and you really don’t have a need for a tractor otherwise), and your electricity supply is a distance away, a motorized wood chipper maybe the ideal machine for your purpose.
These self-contained wood chippers are typically powered by a gasoline engine and are mounted on a chassis which is movable even by hand, or for longer distances can be connected to an ATV or another utility vehicle. This allows you to easily bring the chipper to the location where it’s needed.
Two things you always want to check before starting an engine powered chipper is the fuel and oil level. This is especially important when it comes to new chippers because they usually don’t come filled with oil; this could cause an expensive mistake if it’s not filled up before the first use.
Once you make sure the chipper engine is filled with gas and the oil is clean and full, it’s time to start it up. The process to start one of these machines is pretty simple–I’m going to go over it in a moment, but if you ever have any questions regarding your specific machine make sure to read through the owner’s manual.
Most of these chippers are powered by a standard gasoline engine supplied either by Briggs & Stratton or Honda. Picking those manufacturers offers the added security of widely available warranties. The standard motorized chipper is driven by a 4-stroke, air cooled, 420cc, 13.5HP engine. Those engine provide reliable and powerful operation to chip and shred all wooded materials up to 4” in diameter. That will cover like 90% of any and all needs the large number of wood chippers will ever encounter.
The MDWC-1500 4.5″ Gas Powered Wood Chipper is equipped with an Infeed Chute with an opening of about 20” x 20”. Gravity feeds the material against a drum which contains normally two cutting knives which operate against the counter knife. The drum is driven by the gasoline engine at 2,000RPM. That motion cuts the wood and the centrifugal force created by the rotation of the drum throws out the chips thru the output chute, which usually rotates a full 360 degrees. The engine typically connects via a centrifugal clutch and then transfer the power via a belt drive.
Newer motorized wood chippers employ a disc drive (rotor) which provides for a more efficient operation because the rotor creates a more effective centrifugal force to throw out the chipped material, thereby preventing clogging up.
These advanced Motorized Disc Wood Chippers have a compact design weighing around 500 lb. and the dimension are like 100” long by 40” wide and 70” high. They have a standard 2” trailer hitch ball and axle connected to the chassis. The tires need to be DOT approved and are typical 16” in size to be practical. An Oil sensor for the motor is useful and an emergency stop is a must.
Such a Wood Chipper will do an excellent job in cleaning up your property and will make the work easy and enjoyable and provide for an organic way of supporting your property.
Because these self-contained units are so compact and moveable they are also extremely useful helping with cleanup operations in emergency situations like hurricanes and other wind and flood caused natural disasters.
Starting the Chipper
• Make sure the kill switch, or the fuel cut off, is in the on position. This is usually a red switch but it will be labeled on the machine.
• Then you want to choke the machine. This is the other lever on the engine that is not the kill switch (mentioned above).
• Move the throttle control to the fast position, or the rabbit position, whichever is easier to remember.
• Your model has an ignition switch turn it to the on position now Push the start button.
• Once the engine sounds like it is running good you need to slide the choke into the off position.
• You’re now ready to chip.
There are two ways to handle putting your chipper away when the job is done. The first is to just shut the machine off and park it. The other way, which is best if you know you won’t be using the machine again anytime soon, is to run all the gas out of the engine before storing it.
Running the fuel out of an engine prevents gas going bad inside the engine. This can cause issues over time and means more work for you the next time you try and use your chipper. If you plan on using it again in the near future you can leave fuel in the system with no worries.
That just about covers all there is to know about MDWC 1500, and similar model chippers. Read on for operation instruction on PTO powered chippers, and blade sharpening maintenance for any model.
PTO Powered (Tractor mounted)
BX42S
The BX42S 5″ Self-Feeding Wood Chipper is one of the most well-known chippers due to it’s tried and true design. Relying on simplicity, the low cost BX42S is an effective way to maintain a large property with minimal upfront expense and ongoing cost of upkeep.
Traditionally limited to 4″ chipping capacity, Victory Tractor’s 2021 model is capable of processing logs up to 5″ in diameter while still supporting tractors as low as 18 HP.
It is important to keep in mind that the optimal performance range is between 25-35HP which is necessary to operate at full capacity.
If you’re looking for something with a bit more oomph it may be worth checking out the BX510H below, which features a hydraulic in-feed system suited for high volume processing and adjustable speed controls.
BX510H
The BX510H 5″ Hydraulic Wood Chipper is a 3 Point Hitch mounted to your Tractor, PTO powered wood chipper. These are also appropriate for people who own tractors.
The hydraulic in-feed system pulls in material using two spiked rollers. Because it relies on hydraulic power rather than gravity the operator does not have to be as physically involved.
Safety features include a safety bracket and control arm mechanism enabling the operator to quickly shift between IN, OUT, and STOP function.
This specific model requires around 20 HP minimum to operate, but functions optimally at around 30 HP. It is important to ensure the amount of HP required when purchasing to prevent unnecessary wear on your PTO.
WC8H
For those large scale jobs that require extensive processing power the WC8H 8″ Hydraulic Wood Chipper may be a more suitable option. This model features a completely self-contained infeed system and is capable of processing logs up to 8″ in diameter.
The hydraulic infeed provides for effortless wood chipping and includes all of the safety benefits of the BX510H.
It is important when in the market for one of these chippers to make sure that the PTO on your tractor transfers enough energy to meet the minimum required amount needed for the chipper.
Before you hook up your PTO powered chipper it is important to make sure that the PTO shaft is greased properly.
Hooking up a PTO chipper
The order in which you do the steps may vary depending on personal preference, but I like to start at the bottom and work my way up.
• The first thing you want to do is back the tractor straight up to the wood chipper.
• Start by connecting the bottom two lift links (the ones that form a triangle with the top link) and secure them with the pins provided.
• Connect the PTO shaft to the chipper and then to the tractor (shear pin toward the chipper).
• Lastly you are going to want to connect the top link arm and secure it with the pin provided.
Your PTO powered chipper is now ready for use–all that’s left is to start up your tractor and feed it some branches.
Now that you know how to use both standard types of wood chippers I want to cover knife maintenance. This is something that is going to essentially be the same regardless of the model you have, except for possible minor differences in size and numbers of knives.
Knife maintenance is an unavoidable part of owning a wood chipper–much like any other bladed machine, the knives on a chipper need to be sharp for optimal performance.
You can tell when the blades need sharpening because the discharge from the chute starts to come out in large chunks rather than the intended chips.
Sharpening Chipper Knives
Most chippers today come with reversible knives, meaning you get to dull down both sides before you have to either take them to a shop to be sharpened, or you replace them. I am going to explain how to remove and replace chipper knives, but the sharpening is a tedious task, as balance is a crucial part of these machines proper operation.
If you’re not comfortable sharpening the knives down the exact same just take them to an equipment shop and have them sharpen the knives for you–this can prevent possible damage from uneven blades on the flywheel.
Removing and Replacing Blades
The first thing you want to do when trying to remove your chipper knives for maintenance is to locate the flywheel. This will be housed at the base of the hopper and will be covered up by a metal housing.
Some models may require you to remove the hopper to get to the flywheel; once again if you have any model specific questions refer to the owner’s manual that came with your machine.
• Remove the housing around the flywheel. This is the big metal disk with knives attached.
• Before removing the knives take a mental note, or a picture, so you don’t forget how the blades have to be put back.
• Now you are going to want to remove the bolts from each knife around the flywheel and remove them.
○ If you have trouble with the flywheel spinning while trying to undo the bolts, try to insert a bar through the flywheel to counteract the torque of the wrench.
If your knives are reversible and still have a good edge you can flip them around and reinstall them without sharpening anything. If your knives are dull on both sides you need to either get them sharpened by a professional, or replace them.
• Once your knives are sharpened you want to first remember the way they were installed before.
• Then work your way around the flywheel making sure each knife is bolted down tight to prevent the knives from being jarred loose during future use.
• Replace and bolt down the flywheel housing.
• Lastly you want to replace and bolt the hopper back down.
With your knives sharp and the chipper put back together, it’s ready for some more action.
Conclusion
From setup to maintenance that’s just about everything you should know about both the MDWC1500 standalone, and BX510H PTO powered wood chipper models. These are standard operation and maintenance procedures, but if you ever have any further questions make sure to refer to the owner’s manual provided with your machine, or one provided online.

Victory Tractor Implements is proud to offer a wide range of products including flail mowers, wood chippers, rotary tillers, and backhoes, all designed to be connected directly to your tractor’s PTO for maximum efficiency and performance. In addition, we also offer winter equipment such as snow plows and snow blowers, designed for use with skid steers.
We source all of our equipment directly from the manufacturer and pass the savings on to our customers. As always, the team is standing by to answer any questions to assist with your decision. Victory support can be reached directly at (562) 534-8182 or sales@etractorimplements.com






I would like to know how hard a chipper is on a tractor or skid steer vs a stand alone chipper?
Me too! How hard is it on the tractor?