Hey there folks! If you’re familiar with maintaining land, you know spring means it’s time for some serious mowing, especially as the grass starts growing like crazy. Today, I’m diving into a little project with my Victory flail mower, and I’m here to show you a nifty trick that’s going to make controlling your mower a lot smoother and safer.
Today we’re tackling how to add restrictor valves to your flail mower to improve hydraulic control. If you’ve been dealing with hard swings from your hydraulic system, this guide is for you. Let’s get into it!
| Topic | Installing Restrictor Valves on a Victory Flail Mower |
|---|---|
| Purpose | To improve hydraulic control for smoother, safer operation |
| Key Benefits |
– Reduces jerky hydraulic movements – Provides smoother control on embankments and uneven terrain |
| Tools Needed | – Restrictor valves – Wrench – Loctite 545 – Hydraulic fluid |
| Step-by-Step Process |
1. Release hydraulic pressure 2. Disconnect hoses 3. Install restrictor valves 4. Reconnect hoses 5. Test and fine-tune settings |
| Estimated Time | 1-2 hours depending on experience |
| Recommended Audience | Tractor owners using flail mowers, especially on uneven terrain or embankments |
| Related Video | A detailed video demonstration of the installation and test process |
Victory Flail Mower Compatibility Tool – Which Mower Will Fit Your Tractor?
Why Add Restrictor Valves?
If you’ve ever used a hydraulic flail mower, you know they can be a bit jumpy. The hydraulic movements, like swinging the mower out to the side or tilting it, can sometimes be too abrupt, causing the whole tractor to shake or feel unstable. This isn’t just uncomfortable—it can feel downright dangerous, especially when working on embankments or ditch banks.
That’s where restrictor valves come in. These nifty little devices slow down the flow of hydraulic fluid, giving you smoother and more controlled movements.
What You’ll Need
- Restrictor valves (specific to your hose size): Here
- Wrench to remove and install hoses: Here
- Loctite 545 (optional, to ensure connections stay tight): Here
- Hydraulic fluid (for topping up after installation): Here
Step 1: Understand the Problem
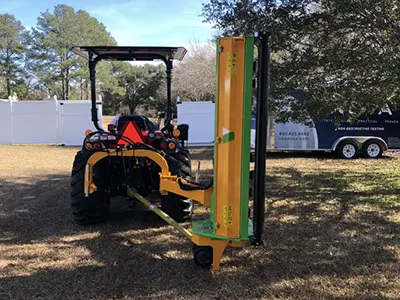
First, let me explain the issue I was facing with my mower. My flail mower, a Victory Tractor Implements EMHD-78, has an embankment feature that allows it to swing out from behind my tractor and tilt up or down depending on the terrain. The problem? The hydraulic movement was way too fast and jerky, making it hard to control—especially when working on uneven ground.
I initially tried installing pilot valves, which helped a bit, but they weren’t perfect. Over time, the vibrations of the tractor would cause the settings to loosen, and I’d lose control again. That’s when I decided to give restrictor valves a try.
Step 2: Gather Your Supplies
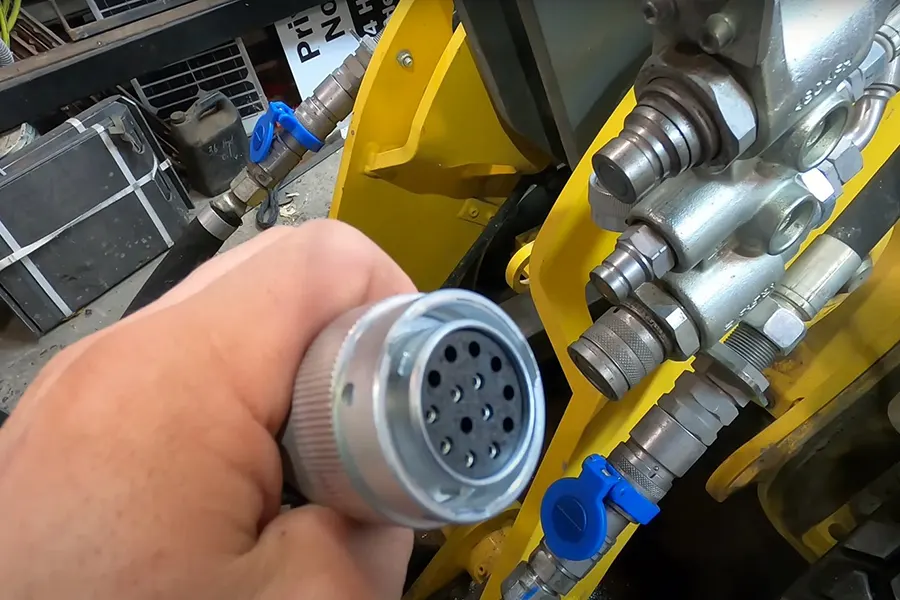
Your first step is getting the right restrictor valves. These restrict the flow of hydraulic fluid, slowing down the movement of your mower. My dealer provided me with restrictor valves that fit my hydraulic lines. Make sure you get the correct size for your hoses and couplers.
The restrictor valve I used has a tiny pinhole that drastically slows down the flow of hydraulic fluid, giving me much better control over my mower’s movements.
Step 3: Release Hydraulic Pressure and Disconnect Hoses
Before you start working, make sure to release the pressure from your hydraulic system. This prevents any unexpected sprays of fluid when disconnecting the hoses. You’ll want to do this by moving the hydraulic control lever to relieve any pressure.
Once the pressure is released, you can disconnect the hoses. Be prepared for some fluid to spill—have a rag handy!
Step 4: Install the Restrictor Valves
Now it’s time to install the restrictor valves. These will thread onto one end of your hydraulic hose, and then the coupler will attach to the other side.
- Apply Loctite 545: To ensure a secure fit, I applied some Loctite 545 to the threads. This helps keep the valves tight, even when vibrations from the tractor are at play.
- Tighten the Connections: Use your wrench to give everything a good tighten. Don’t forget to grunt for good measure—makes it feel more secure, right?
Step 5: Reconnect the Hoses
After the restrictor valves are securely in place, reconnect the hoses to your tractor’s hydraulic system. Make sure everything is snug and secure before moving on.
Step 6: Test the Movement
Here’s the fun part: testing out the new setup. Hop in your tractor, start it up, and see how the mower moves with the restrictor valves in place.
- Without Restrictors: Before, the hydraulic movements were too fast, especially when tilting the mower or swinging it out. I’d lose control and the mower would jerk around.
- With Restrictors: Now, the movement is much smoother. Even when I engage the detent (the locking mechanism), the motion is controlled and steady. It’s night and day compared to the original setup!
Step 7: Fine-Tune If Necessary
If you notice the mower’s movement is too slow in some directions, consider swapping the restrictor valve placement. For me, I liked the slow outward movement for safety but preferred a slightly faster tilt. You can always adjust based on your specific needs.
Step 8: Check Hydraulic Fluid Levels
After any hydraulic work, always check your fluid levels and top off if needed. Spilling some fluid during the process is common, so it’s a good idea to ensure everything’s topped off before you get back to work.
Final Thoughts
After installing the restrictor valves, I’ve got much more control over my flail mower’s movements. The jerking is gone, and now it feels a lot safer and smoother, especially when working on embankments. If you’re dealing with the same problem, I highly recommend giving this a try.
If you enjoyed this tutorial, feel free to like and subscribe—I’ll be sharing more tractor tips and tricks soon. And as always, if you’ve got any ideas or suggestions, drop them in the comments!
Thanks for reading, and happy mowing!
FAQ
1. Why would I need restrictor valves for my flail mower?
Restrictor valves are useful if your flail mower’s hydraulic movements are too fast or jerky, making it difficult to control. These valves help slow down the hydraulic flow, providing smoother and safer operation, especially on uneven terrain or embankments.
2. What tools and supplies do I need to install restrictor valves?
You’ll need restrictor valves specific to your hydraulic hose size, wrenches for disconnecting and tightening hoses, Loctite 545 for thread security, and hydraulic fluid to top off your system after installation.
3. How do I release pressure from my hydraulic system before installing the valves?
To release pressure, move your hydraulic control lever to relieve any built-up pressure in the system. This prevents unexpected fluid spills when disconnecting the hoses.
4. Can I adjust the flow of my flail mower without using restrictor valves?
Yes, but it’s more difficult. Some tractors have built-in flow control for certain implements, but if yours doesn’t, restrictor valves are an effective and affordable way to gain control over hydraulic movements.
5. Do I need to upgrade to flat-face connectors for my hydraulic system?
Flat-face connectors aren’t necessary but can make your hydraulic system cleaner and easier to manage by preventing fluid spills when disconnecting hoses. They can be especially useful if you frequently switch between different implements.
Disclaimer: The information provided in this blog post is for informational purposes only. Victory Tractor Implements and its affiliates, authors, and contributors are not responsible for any damages, injuries, or losses that may result from the application of the information provided. It is the reader’s responsibility to ensure that any modifications or installations are done correctly and safely. Always consult with a professional or expert before making any changes to your tractor or equipment.
![]()
Victory Tractor Implements is proud to offer a wide range of products including flail mowers, wood chippers, rotary tillers, and backhoes, all designed to be connected directly to your tractor’s PTO for maximum efficiency and performance. In addition, we also offer winter equipment such as snow plows and snow blowers, designed for use with skid steers.
We source all of our equipment directly from the manufacturer and pass the savings on to our customers. As always, the team is standing by to answer any questions to assist with your decision. Victory support can be reached directly at (562) 534-8182 or sales@etractorimplements.com