Hey there, Skid Steer enthusiasts! If you’ve just snagged a new Skid Steer attachment and are eager to get it up and running, you’ve come to the right place. Today, we’ll walk you through the process of hooking up your attachment to ensure everything runs smoothly. Whether you’re a seasoned pro or a newbie, this guide will make the setup process a breeze. Let’s dive in!
| Topic | Summary |
|---|---|
| Prep Your Equipment | Ensure your skid steer coupler and attachment plate are clean and familiarize yourself with your machine’s functionality before starting. |
| Positioning and Connecting | Align the skid steer with the attachment, tilt the coupler to grab the attachment, and secure it using hydraulic locks or manual pins. |
| Secure the Connection | Double-check that the quick-tach pins are fully driven through the attachment and that there’s proper clearance between the machine and the attachment. |
| Connecting Hydraulic Hoses | Release pressure in the hydraulic system, clean the couplers, and connect hoses securely, ensuring proper hose routing to avoid damage. |
| Connecting Electrical Controls | Connect the attachment’s electrical system to the skid steer, ensuring proper wiring for features like remote control and motor operation. |
| Final Checks and Testing | Inspect all connections, test controls, and perform a break-in process for attachments with hydraulic motors. |
| Maintenance Tips | Regularly inspect hoses and couplers, equalize hydraulic pressure when detaching, and ensure proper routing to extend equipment lifespan. |
Before You Begin: Prep Your Equipment
Cleanliness is Key
First things first, make sure your Universal Skid Steer quick-tach coupler and the Universal quick-tach plate on your attachment are spotless. Dirt and debris can interfere with the connection, leading to potential issues down the line. A clean setup ensures a smooth and secure fit every time.
Familiarize Yourself with Your Machine
It’s crucial to understand your skid steer’s carrier functionality. Some attachments come with hydraulic hoses, while others might have electrical control harnesses. Knowing the specifics of your machine and attachment will save you time and headaches. Also, check all fluid levels to ensure your skid steer is operating optimally before you start.
Step 1: Positioning and Connecting the Quick-Tach Coupler
Align and Slide
Begin by slowly driving your skid steer up to the attachment. Tilt the skid steer coupler forward and gently slide it into the quick-tach plate. As you do this, tilt the coupler back slowly, ensuring it grabs the top lip of the quick-tach plate.
Secure the Connection
Once the coupler is fully tilted back, the quick-tach plate should slide down onto the skid steer coupler, seating it firmly. It’s vital to verify that the top lip of the attachment is fully seated on the coupler. Look for reference marks on your machine’s coupler to confirm proper seating. If it’s not fully seated, the quick-tach pins won’t lock in, and your attachment won’t be secure.
Lock It Down
Depending on your machine, you’ll either:
- Press and hold the hydraulic lock button from your cab until the couplers are secure. Look for red or orange indicators to confirm the attachment is locked.
- Manually push down the locking levers outside the cab if your machine uses manual pins.
Step 2: Ensuring a Secure Connection
Double-Check the Pins
Once locked, lift the attachment slightly and visually inspect from the operator’s cab to ensure the pins are fully driven through the quick-tach plate. This step is crucial for the safety and stability of your setup.
Inspect Fit and Clearance
Take a moment to check the fit of your new attachment. Ensure there’s adequate clearance between the attachment and the machine carrier. This prevents any unnecessary strain or potential damage during operation.
Step 3: Connecting Hydraulic Hoses
Release Hydraulic Pressure
Before connecting hydraulic hoses, release the pressure in your skid steer’s hydraulic system. This step varies depending on your machine:
- Newer Machines: Typically have a relief manifold at the hookup point. Press the hydraulic male and female couplers inward to release any pressure.
- Older Machines: May require a manual procedure, such as pressing a button in the cab or following shutdown steps. Always consult your machine’s owner manual for the correct method.
Clean and Connect Hoses
Wipe the hydraulic couplers clean to prevent contamination. When connecting, ensure the male and female couplers align properly. Push them together until they’re securely attached. If your attachment has a third coupler, usually for case drains, make sure to connect it as well. This is vital for the attachment’s safety and functionality.
Manage Hose Routing
Examine your hoses for any pinch points or potential damage. Common areas to watch include around the quick-tach coupler and near the loader arms. Proper hose routing not only prolongs the life of your hoses but also minimizes the risk of unexpected downtime.
Step 4: Connecting Electrical Controls
Plug It In
If your attachment uses electrical controls:
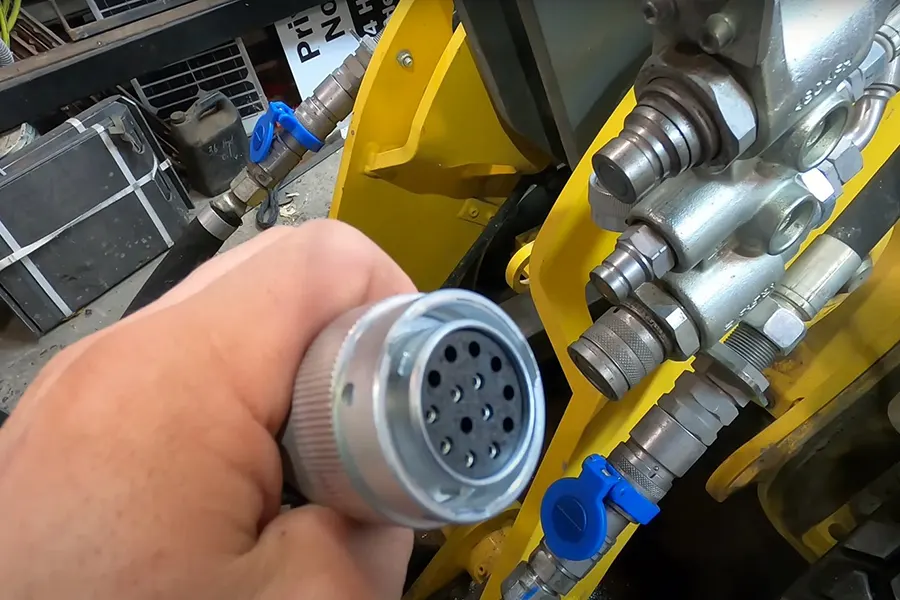
- Connect the wire harness from the attachment to the skid steer’s electrical system. Most connections use a twist-lock type plug, so align the notches properly and twist to lock in place.
- Set up the Universal toggle in your cab and supply 12V electricity if your machine doesn’t have machine-specific controls. Check the video link at the end of this guide or reach out to your product Guru for detailed instructions.
Configuring a 3rd Party Control Box to work with Skid Steer Controls
For those that wish hook up directly to their skid steer controls rather than use the included control box, Skid Steer Genius offers a variety of adapters and wiring harnesses to suit 7-pin, 8-pin, and 14-pin controllers.
ex. Remote Control for Output Chute: Victory Skid Steer Snow Blowers are equipped with a self-contained control panel (remote control) that routes into your cab. It rotates the output chute and is powered by connecting the positive/negative wires of the control panel to a power source on your skid steer (typically the battery). The panel is connected to 4 Din pins on the control valve which is mounted to the snow blower, one attached to each solenoid (the solenoids are 12V each).
Depending on your skid steer make / model you will need to consider one of the below configurations:
7-pin (Bobcat)
- SG-DTR-DIN-6 – 6″ Deutsch to DIN Adapter Cable (x4)
- SG-DT-DT-18 – Genius – 7 Pin Controller Jumper – 18″ – Deutsch (x4)
- SG-CB-4000A-100 – Genius 7 Pin Controller For Bobcat (x1)
8 pin (ASV and Caterpillar ABC series)
- SG-DTR-DIN-6 – 6″ Deutsch to DIN Adapter Cable (x4)
- SG-BPH-8-4-9DP/DT – 8 Pin Female to Delphi 2 Pin Harness (with DEUTSCH plugs) (x1)
14-pin (various makes)
These configurations will work with 99.9% of skid steers, but always make sure to contact the nice folks at Skid Steer Genius to confirm compatibility with your exact skid steer make / model or if hooking up to something other than a Victory snow blower.
Step 5: Final Checks and Testing
Visual Inspection
Before you head out, do a thorough visual inspection. Ensure:
- All connections are tight and secure.
- There are no obstructions or potential pinch points in hose routing.
- The attachment has full range of motion without any hindrance.
Test the Controls
Get back into your skid steer and test all attachment functions. Make sure everything operates smoothly:
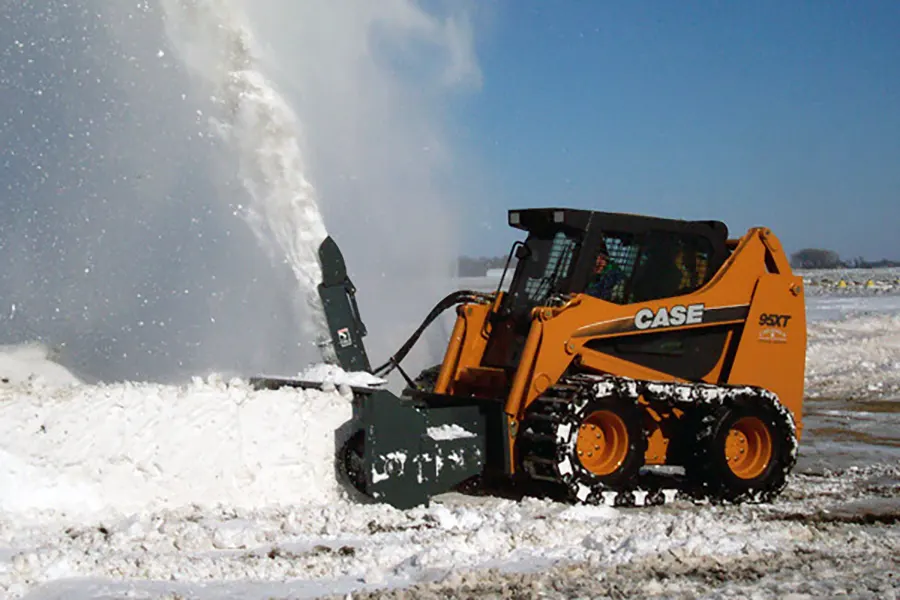
- For attachments like snowblowers, engage the hydraulics and test electric controls.
- For other attachments like grapples, ensure the hydraulics respond correctly.
Break-In Process for Hydraulic Motors
If your attachment has a hydraulic motor, perform a motor break-in:
- Find a safe, open area.
- Engage the hydraulic motor at low RPMs.
- Let it run continuously for about 10 minutes to ensure optimal performance and longevity.
Tips for Longevity and Maintenance
Equalize Hydraulic Pressure
To prevent pressure buildup in your hydraulic lines:
- Plug the male and female couplers into each other when removing attachments. This not only equalizes pressure but also keeps the couplers clean and ready for next use.
Protect Your Couplers
Hoses and couplers are prone to damage from impacts or harsh conditions. Ensure they’re:
- Securely routed to avoid snagging.
- Protected from excessive movement or exposure to harsh elements.
Regular Maintenance
Regularly inspect and maintain your hydraulic hoses and couplers. Keeping them in top condition reduces the risk of unexpected failures and extends the lifespan of your equipment.
Ready to Work!
Congratulations! 🎉 You’ve successfully hooked up your new Skid Pro attachment. With everything checked and double-checked, you’re all set to tackle your projects with confidence. Remember, proper setup is key to maximizing the performance and longevity of your equipment.
Thank you for choosing Victory Tractor Implements. We’re committed to providing better products, better service, and happier customers. If you have any questions or need further assistance, don’t hesitate to reach out. Happy hauling!
Stay tuned for more tips, tricks, and guides to keep your skid steer running smoothly. Until next time!
Frequently Asked Questions (FAQ)
1. How do I know if my skid steer attachment is securely connected?
After locking the attachment, lift it slightly and check that the quick-tach pins are fully driven through the attachment plate. Additionally, ensure there’s no excessive movement and that the attachment is properly seated.
2. What should I do before connecting hydraulic hoses?
Always release the hydraulic pressure in your skid steer system before connecting hoses. Clean the couplers to avoid contamination, and make sure to align and securely attach the male and female couplers.
3. How do I prevent hydraulic hose damage during operation?
Proper hose routing is key. Ensure hoses are routed away from pinch points or areas where they might get damaged. Regularly inspect hoses for wear and tear.
4. What if my attachment uses electrical controls?
For attachments with electrical controls, connect the wiring harness to your skid steer’s electrical system. Ensure the connections are secure and compatible with your skid steer model. For advanced configurations, such as using 3rd party control boxes, consider using adapters or consulting with professionals like Skid Steer Genius.
5. How do I maintain my skid steer attachment to ensure longevity?
Regularly inspect all components, including hydraulic hoses and couplers, for damage or wear. Equalize hydraulic pressure when removing attachments and ensure couplers remain clean. Proper maintenance reduces the risk of failure and prolongs equipment life.
Disclaimer: The information provided in this blog post is for informational purposes only. Victory Tractor Implements and its affiliates, authors, and contributors are not responsible for any damages, injuries, or losses that may result from the application of the information provided. It is the reader’s responsibility to ensure that any modifications or installations are done correctly and safely. Always consult with a professional or expert before making any changes to your tractor or equipment.

Victory Tractor Implements is proud to offer a wide range of products including flail mowers, wood chippers, rotary tillers, and backhoes, all designed to be connected directly to your tractor’s PTO for maximum efficiency and performance. In addition, we also offer winter equipment such as snow plows and snow blowers, designed for use with skid steers.
We source all of our equipment directly from the manufacturer and pass the savings on to our customers. As always, the team is standing by to answer any questions to assist with your decision. Victory support can be reached directly at (562) 534-8182 or sales@etractorimplements.com

