Have you ever wished you had an extra set of hydraulics on your tractor? Does it feel like a hassle when you have to constantly switch hoses to get full functionality out of your implements? You’re not alone, this has become a common problem for tractor owners as tractor implements have continued to require greater functionality than ever before.
But the good news is that you don’t have to suffer just because your tractor has limited built-in hydraulic functions. You can actually add an extra set of hydraulics to your tractor so that you’re able to use multiple attachments simultaneously without breaking the bank!
So, dive deeper into this concise yet comprehensive guide and see the benefits and steps of adding extra set of hydraulics to your tractor!
Key Points
| Topic | Details |
|---|---|
| Why add hydraulics | Many implements require two or more independent hydraulic circuits to unlock all features. |
| Fast, budget option | A Hydraulic Multiplier (diverter) time-shares one existing remote across multiple circuits via a switch box. |
| Pro-level control | Power Beyond + Rear Remotes gives continuous high-pressure flow (PB) and seat-mounted controls (remotes) for independent cylinders. |
| Practical path | Start with a multiplier to stop hose-swapping. If you need simultaneous/independent control, add PB + rear remotes. |
Why You Need an Extra Set of Hydraulics?
Hydraulics are the cylinders that provide movement of a variety of implements, such as up and down or left and right movement. Many implements require two, sometimes three independent hydraulic circuits to achieve full functionality.
But apart from this obvious use, there are two other significant benefits of adding an extra set of remotes to a tractor.
Many Implements Require Multiple Remotes
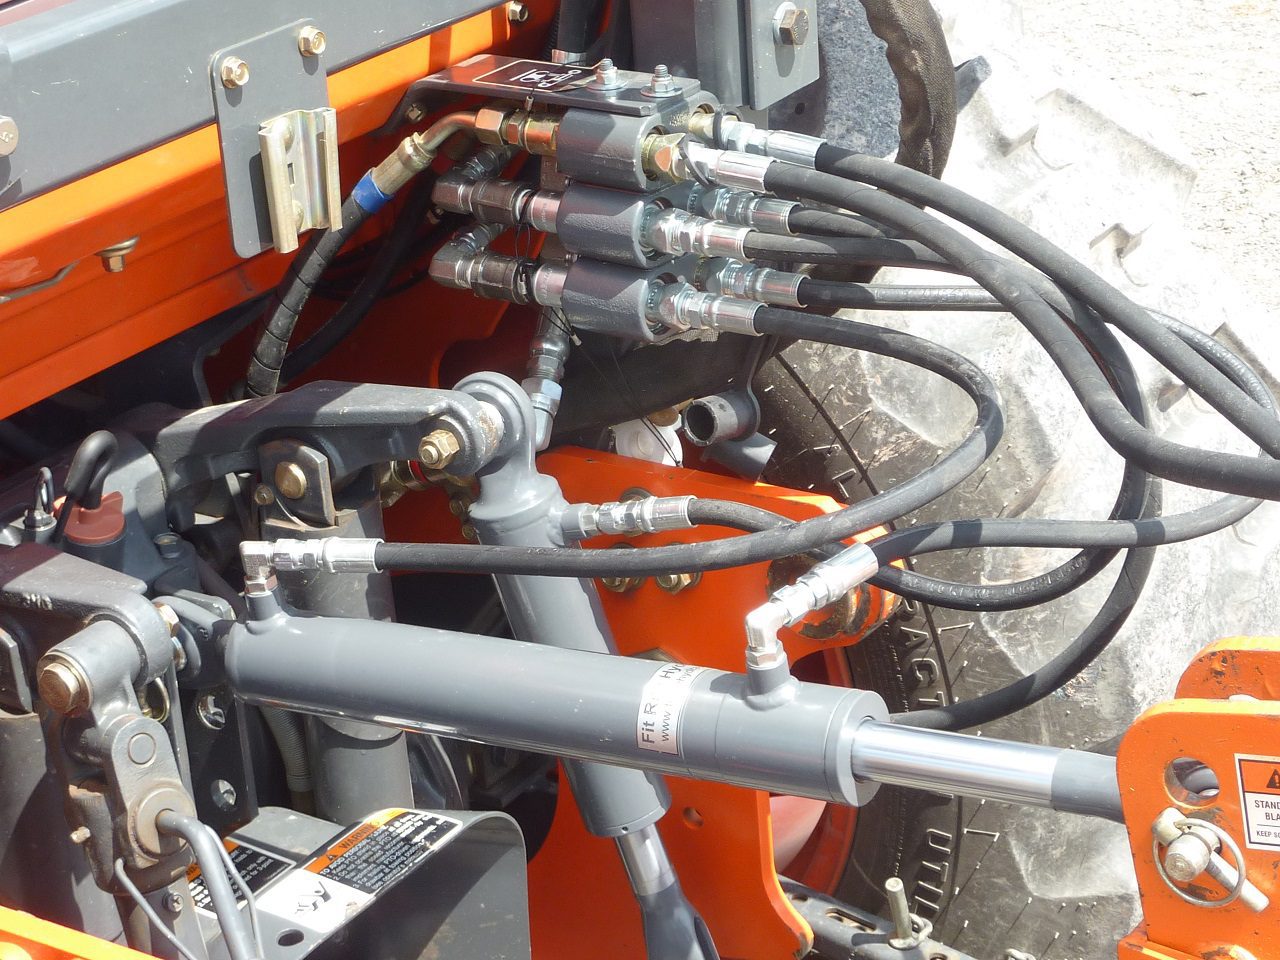
Many attachments, such as embankment and offset flail mowers, require more than one hydraulic circuit to operate. So, if your tractor has a single set of hydraulics, you are limited in operating capacity.
Each independent function, or circuit, requires two ports; one port for each movement. For example, if you have a mower that requires both up and down and left and right movement you will need two functions with a total of 4 ports.
These attachments need additional hydraulics to support a range of movement. While possible to operate on a single set, it can be cumbersome to constantly switch the hoses every time you need to control a new function.
Use Attachments on the Back and Front
Not all tractors come equipped with front and rear remotes. Adding an extra set of hydraulics to the rear of the tractor will expand the number of implements that can be used, such as flail mowers, wood chippers, and many more.
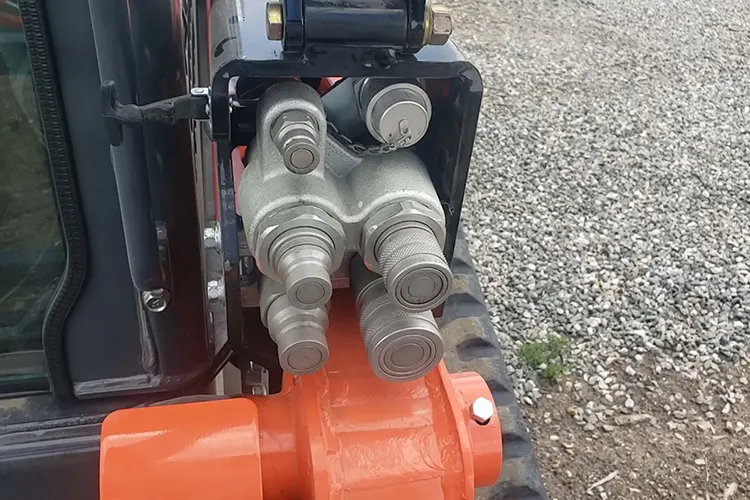
Option 1: Add an Extra Set of Hydraulics to Tractor with a Hydraulic Multiplier kit
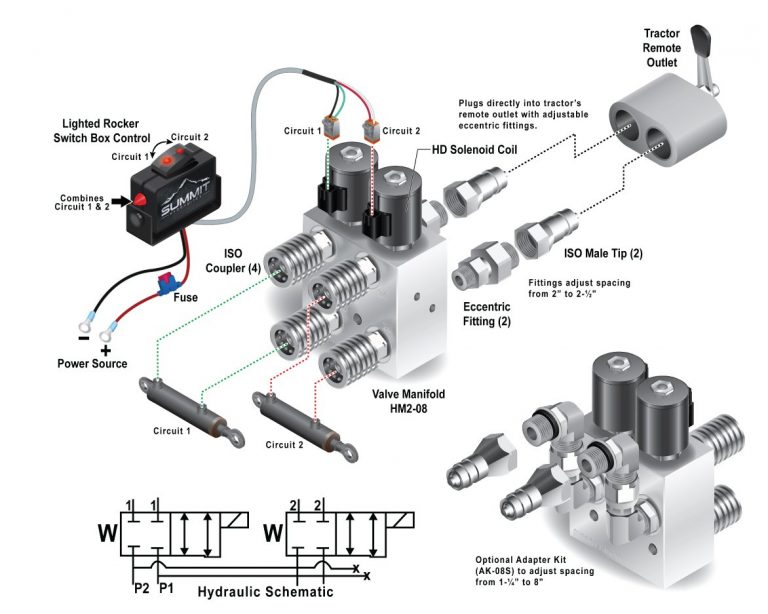
A Hydraulic Multiplier provides additional hydraulic functions by tapping into your existing hydraulic system. As the name implies, it “multiplies” the number of hydraulic couplers available giving you access more functions in real-time. It comes equipped with a control box that allows you to easily switch between functions, alternating between movements such as up and down, left and right, open and close, etc. Installation is quick, easy, and perhaps most importantly, cost effective.
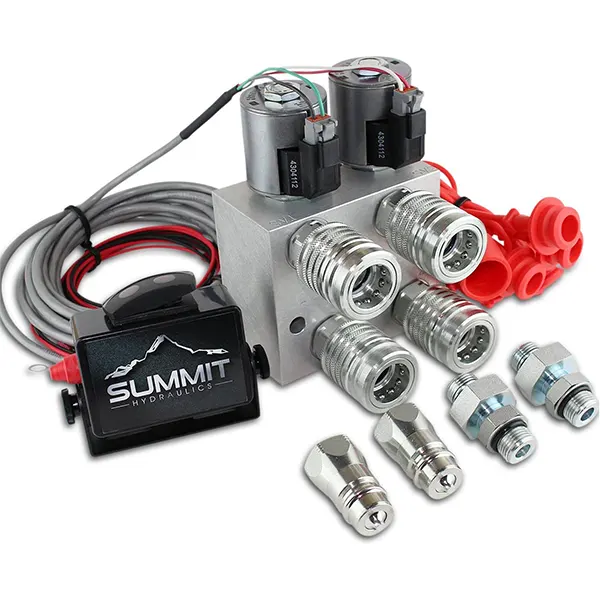
2 Circuit Hydraulic Multiplier Kit by Summit Hydraulics
👉 Need more than two circuits? Check out the below hydraulic multiplier kits including:
3 Circuit Selector | 4 Circuit Selector | 6 Circuit Selector
Here’s a list of things you need for the procedure followed by a step-by-step guide:
What You Need:
• Hydraulic Multiplier kit
• Gel Lubricant
• Wrench
• Clean cloth
• Zip ties
👉 For John Deere tractors with Older Style JD Style Couplers you will need the Hydraulic Multiplier Kit, SCV Splitter/Diverter Valve w/JD Old Style Couplers w/Switch Box
How to Install
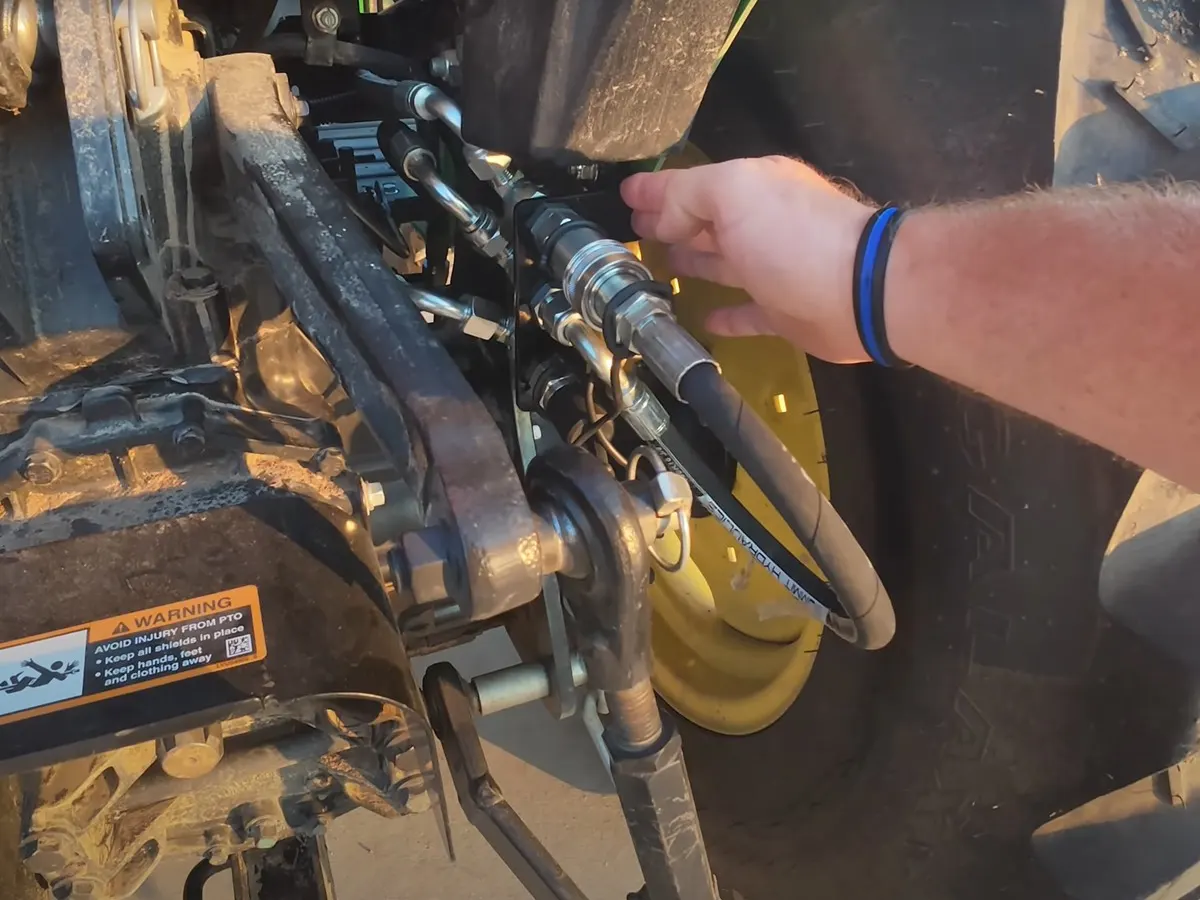
Step 1: Lubricate couplers before inserting into hydraulic multiplier base. WD-40 Gel Lubricant works well for this purpose. Do not use Teflon tape or similar as these couplers are not designed for that application. Use a wrench to tighten
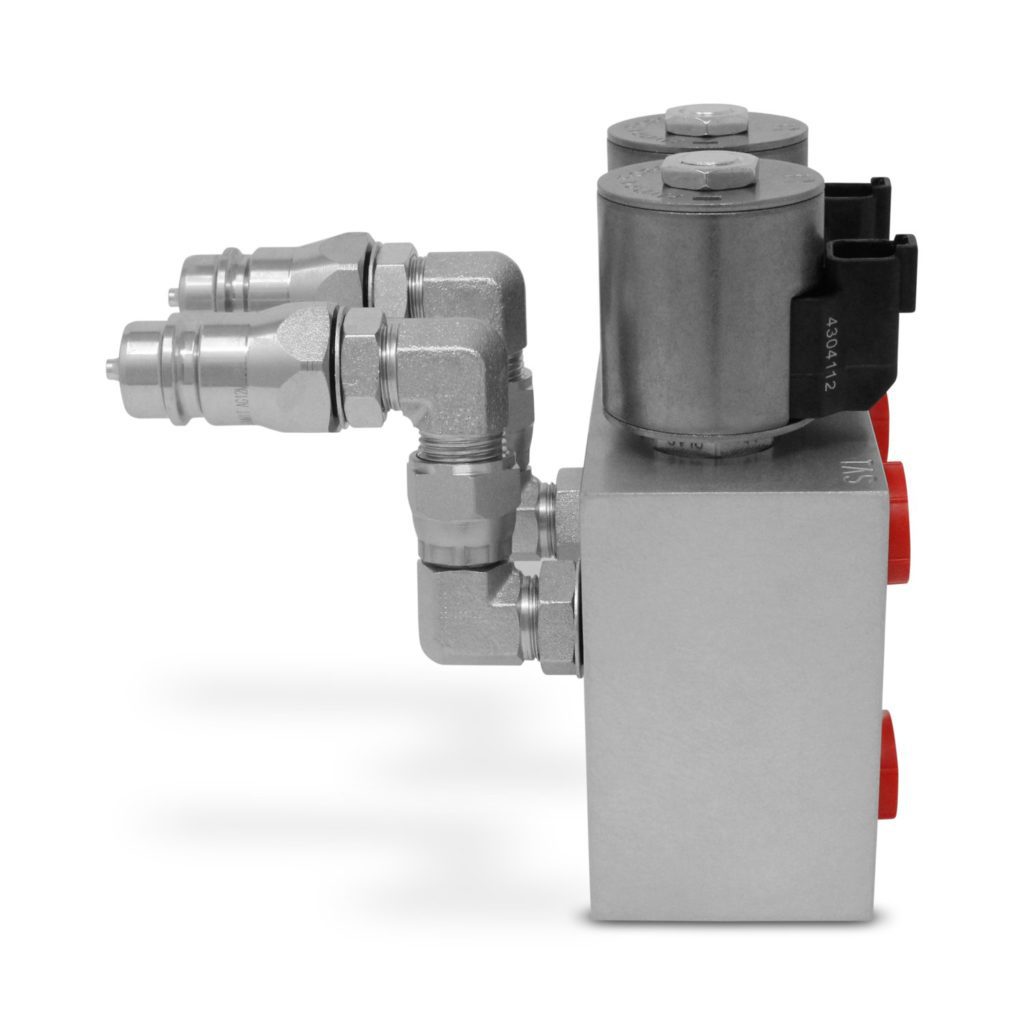
Step 2: Install eccentric fittings in the opposite side of the base. Once completed, add Male tips to each eccentric fitting. They should be able to turn, allowing the fittings to rotate and to fit securely into remote housing.
Step 2a: Some tractors may have brackets or other obstructions preventing installation. In this scenario, there is an adapter kit with right angle fittings that can be added to allow for additional movement providing the necessary clearance. First you will install the male-to-female fittings, followed by the male-to-male fittings, and finally add the Male tips to complete the modification. Now you will be able to rotate the fittings according to your needs. Use wrench to tighten securely.
Universal Hydraulic Multiplier Adapter Kit
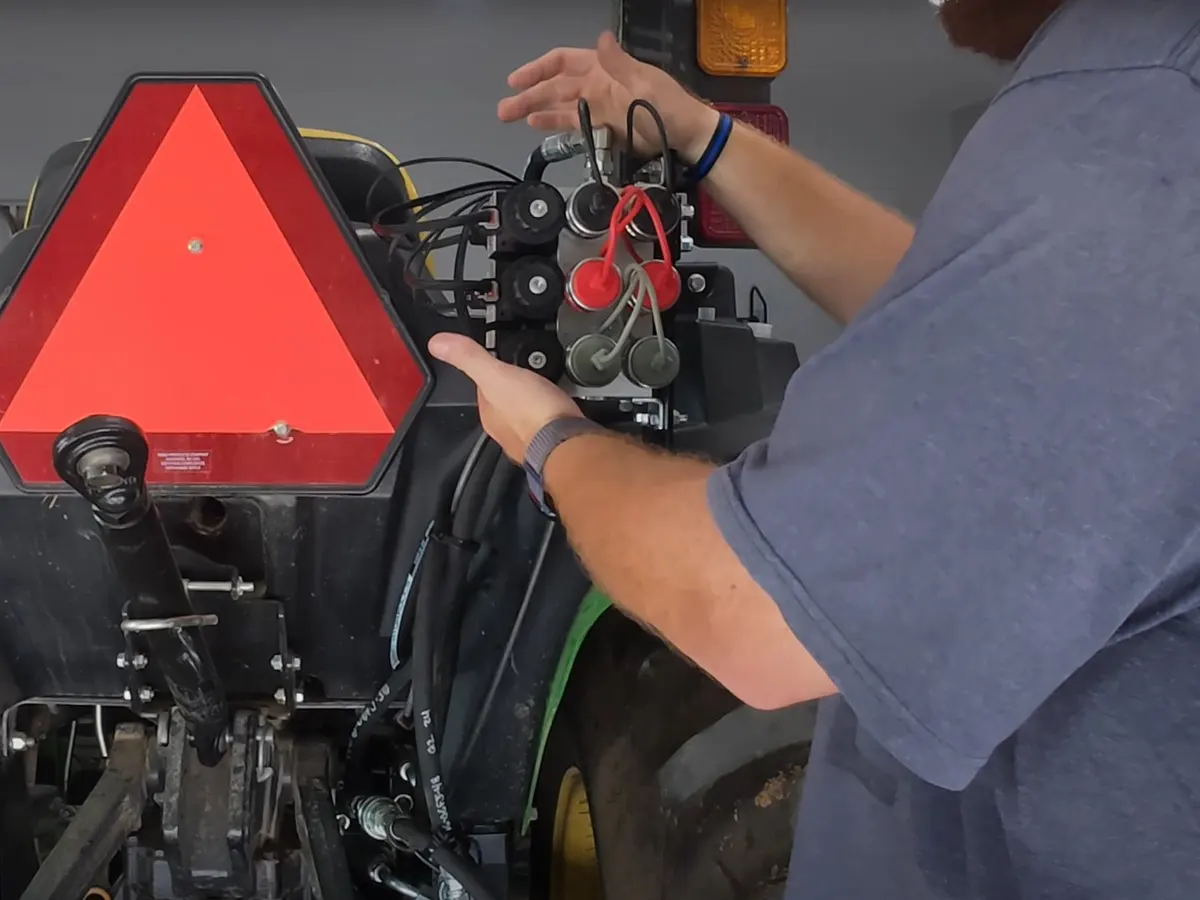
Step 3: Connect wiring box to hydraulic multiplier block by plugging circuit 1 and circuit 2 into the fittings in the solenoid cells. Run circuit line back through tractor to the operator area, securing to stationary lines by zip tie or other mechanism, ensuring they are safely out of the way.
Step 4: Mount switch box to a switched power source, such as an accessory switch. The red cable needs to be connected to a positive terminal and the black cable needs to be grounded.
That’s it! You now have an additional set of hydraulics that will allow you to operate a second function, such as vertical or horizontal movement. As an added bonus, this kit can easily be disassembled and removed from the tractor as needed.
For a video walkthrough, we recommend checking out Ask Tractor Mike on YouTube. His channel is chock full of good information, tips-and-tricks, and instructional videos to help you make the most of your investment.
Option 2: Add Power Beyond (for tractors without rear hydraulics)
What Power Beyond (PB) is: a dedicated high-pressure, continuous-flow supply and return routed to the rear of the tractor. PB by itself doesn’t give you operator control—it simply supplies oil for an attachment or valve bank. If nothing is attached, you must keep the PB loop connected so the circuit returns to the system.
Why PB matters
- Feeds implements that have their own valves (e.g., many backhoes).
- Acts as the supply for a rear remote valve kit (next section), which gives you seat-mounted control of multiple cylinders (side-shift, tilt, top/tilt, etc.).
Example: John Deere 3025E / 3032E / 3038E install highlights
- Access the pressure/return/tank connections behind the right rear wheel.
- Deere’s steel lines typically use ORFS (face-seal) fittings.
- Clean method to keep factory hard lines: tee the tank line; cut the pressure tube and add a ½″ compression fitting to branch the PB feed to your rear bracket (instead of replacing long sections with hose).
- Mount a rear 3-port bracket labeled P (pressure out) / PB return / Tank and include a PB jumper hose so the loop stays closed when no implement is connected.
- Leak-check at idle; some techs pull a slight vacuum on the case when cracking lines to minimize fluid loss.
Option 3: Add Rear Remotes (true operator control at the seat)
If you need to control multiple cylinders independently (e.g., embankment mower side-shift + tilt, hydraulic top link, etc.), add a rear remote valve kit (2–4 spools). The valve bank mounts near the rear/ROPS; switches or a joystick mount near the seat. Requires Power Beyond as the feed.
Install tips that help first-timers
- Align each solenoid’s “P” with the manifold’s pinhole mark; lube O-rings with your tractor’s UTTO before assembly.
- Most manifolds include a GA (gauge) port for diagnostics.
- Wire the switch box into a switched 12V fuse using an add-a-circuit; ground to frame; tidy the loom under the seat and up the ROPS.
- On JD 3E, molded fender plastics limit space—many owners make a simple flat-stock bracket for a clean mount that doesn’t block sightlines or the fuel cap.
Rear Remote Kit – John Deere 1 Series (2-Spool) Rear Remote Kit – John Deere 2/3 Series (2-Spool) Rear Remote Kit – Kubota MX & L Series (2-Spool) Rear Remote Kit – Kioti CK Series (2-Spool) Rear Remote Kit – Universal Fit (2-Spool)
Related (front loader): Third-Function Kits
Third Function Kit – John Deere Third Function Kit – Kubota Third Function Kit – Universal Fit
Diverter vs. Power Beyond vs. Rear Remotes (Which should you pick?)
- Hydraulic Multiplier (diverter)
What it does: Shares a single remote across multiple functions via electric switching.
Best for: Budget upgrades, occasional multi-function use when you don’t need two cylinders moving at once. - Power Beyond (PB)
What it does: Provides continuous high-pressure flow to the rear; must be looped when unused.
Best for: Backhoes (with their own valve), or as the supply to a rear remote valve bank. - Rear Remotes (valve bank)
What it does: Gives true operator control (2–4 spools) for independent cylinders.
Best for: Embankment/ditch-bank flail mowers, hydraulic top/tilt, anything needing simultaneous/independent control.
Quick Checklist (JD 3E example)
- Remove the right rear wheel for access to pressure/return/tank.
- Tee the tank (ORFS tee → adapter to JIC as needed).
- Keep hard lines: cut pressure tube and add ½″ compression fitting to branch PB supply.
- Mount rear PB bracket (ports: P / PB return / Tank) and install the PB jumper.
- Feed your rear remote manifold from PB; plumb manifold tank to tractor tank port.
- Wire switch box to a switched 12V fuse; test each spool, then tidy the loom.
The Takeaway
Adding additional remotes to your tractor can be expensive, but there are ways to minimize those costs by taking a hands-on approach. Doing so will likely extend the life of your tractor, while opening the door to a whole new world of implements at your disposal.
After all, who couldn’t use a few more toys to play with?
FAQs
Why do I need an extra set of hydraulics on my tractor?
Hydraulics provide movement to a variety of implements. Many attachments require more than one hydraulic circuit to operate, so if your tractor only has a single set of hydraulics, you are limited in operating capacity.
What are the benefits of adding an extra set of hydraulics?
Adding an extra set of hydraulics to your tractor allows you to use multiple attachments simultaneously. It also expands the number of implements that can be used, such as flail mowers and wood chippers.
What is a Hydraulic Multiplier kit?
A Hydraulic Multiplier kit provides additional hydraulic functions by tapping into your existing hydraulic system. It “multiplies” the number of hydraulic couplers available, giving you access to more functions in real-time.
What do I need to install a Hydraulic Multiplier kit?
You will need the Hydraulic Multiplier kit itself, a gel lubricant, a wrench, a clean cloth, and zip ties.
How to install a Hydraulic Multiplier kit?
First, lubricate the couplers before inserting them into the hydraulic multiplier base. Install eccentric fittings on the opposite side of the base. Connect the wiring box to the hydraulic multiplier block by plugging circuit 1 and circuit 2 into the fittings in the solenoid cells. Finally, mount the switch box to a switched power source.
Can the Hydraulic Multiplier kit be removed from the tractor?
Yes, the kit can easily be disassembled and removed from the tractor as needed.
Where can I find a video walkthrough for installing a Hydraulic Multiplier kit?
We recommend checking out Ask Tractor Mike on YouTube for a video walkthrough on how to install a Hydraulic Multiplier kit.
Disclaimer: The information provided in this blog post is for informational purposes only. Victory Tractor Implements and its affiliates, authors, and contributors are not responsible for any damages, injuries, or losses that may result from the application of the information provided. It is the reader’s responsibility to ensure that any modifications or installations are done correctly and safely. Always consult with a professional or expert before making any changes to your tractor or equipment.
![]()
Victory Tractor Implements is proud to offer a wide range of products including flail mowers, wood chippers, rotary tillers, and backhoes, all designed to be connected directly to your tractor’s PTO for maximum efficiency and performance. In addition, we also offer winter equipment such as snow plows and snow blowers, designed for use with skid steers.
We source all of our equipment directly from the manufacturer and pass the savings on to our customers. As always, the team is standing by to answer any questions to assist with your decision. Victory support can be reached directly at (562) 534-8182 or sales@etractorimplements.com


I have 2020 Mahindra Emax 20s subcompact tractor. I am wanting to put a 40in Victory Embankment Flail mower as a rear attachment. What do I need for this to happen?
You will need a standard 3-point hitch and two rear remotes (4 ports) to operate the TRIM-40. That being said, your tractor’s gross weight should be at least 2000 lbs. including front end loader, cab, etc. and minimum 20 HP at the PTO to run at full capacity.
I have a John Deere 6110m 110hp with 2sets of remotes I need 4 to operate a 3 point Linkage challenge G24 grader blade . Wha
ts the cost to upgrade my remotes
Take a look at the 4 circuit selector kit